
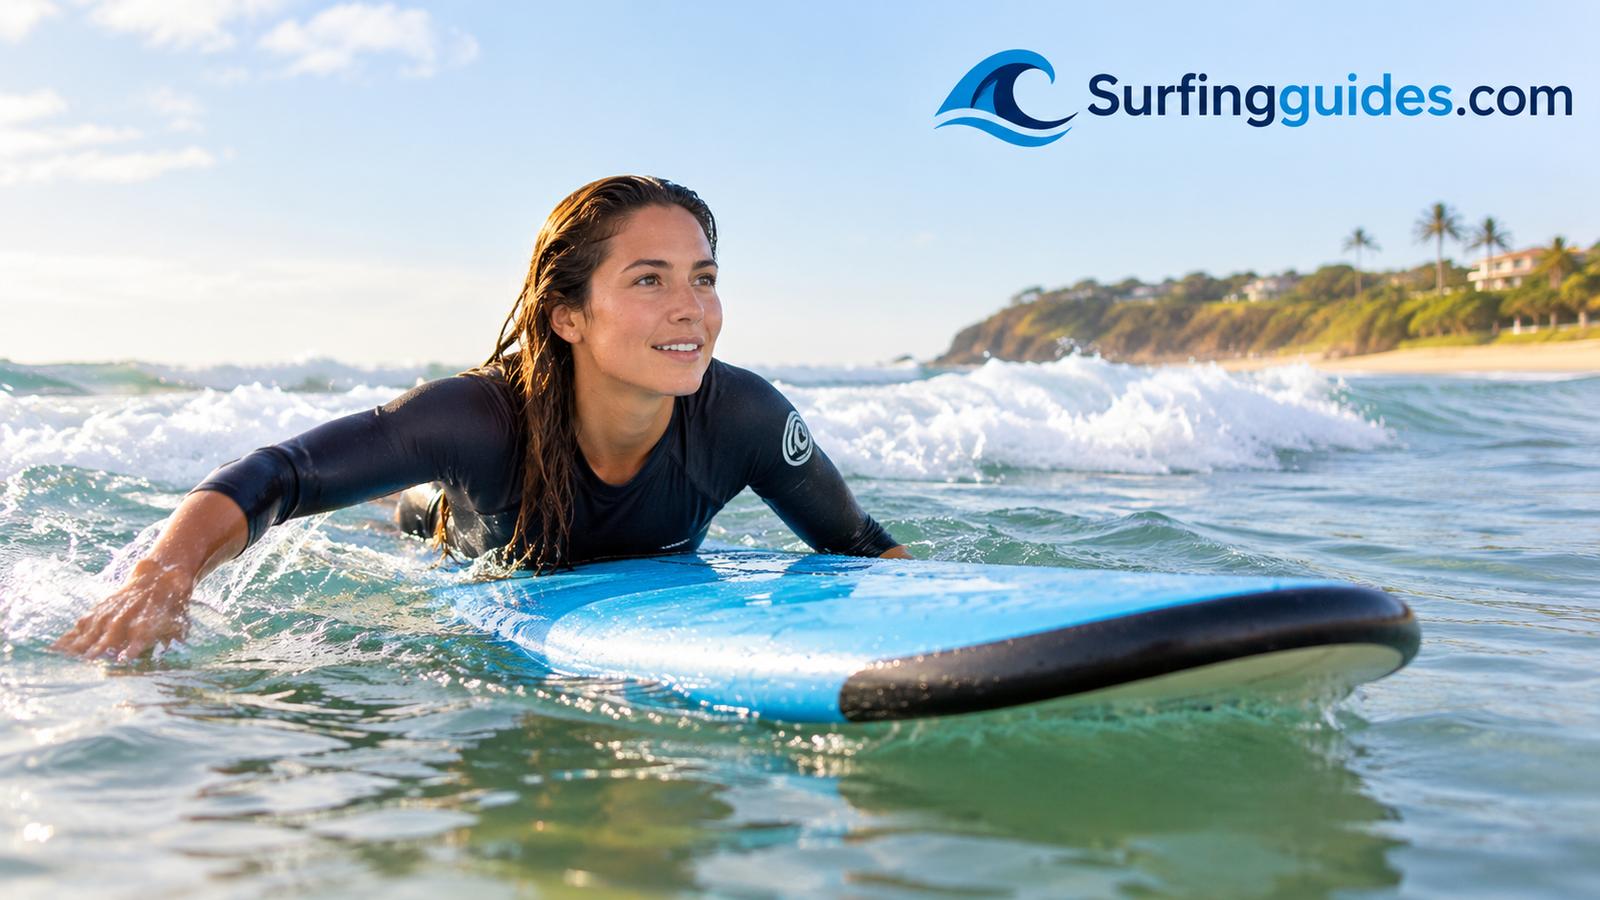
How to Start Surfing: A Complete Beginner’s Guide From Sand to First Wave
Everything a first-timer needs: the right board, the right wetsuit, the right beach, and eight clear steps that take you from lying on the sand to riding your first real wave.

The short answer: To start surfing, rent or buy a large soft-top board (eight feet or longer), wear a wetsuit that fits your water temperature, and choose a small, uncrowded beach break with sandy bottom. Practice lying, paddling, and your pop-up on dry sand first, then catch knee-high whitewater waves in waist-deep water until standing feels automatic. Book a lesson or two if you can. Move to unbroken green waves only after you can stand up on most whitewater rides.
What Surfing Really Involves Before You Paddle Out
Most people picture surfing as the last ten seconds: a person gliding across a glassy wave with a perfect stance. In reality, that moment sits on top of a surprisingly large pile of ordinary skills. You carry a bulky board down a beach. You read moving water. You paddle with real effort. You time a wave, pop to your feet, balance on a surface that never stops changing, and then fall off, climb back on, and do it again. A single session might include fifteen minutes of actual riding and two hours of everything else.
Understanding that mix up front makes learning far more enjoyable. If you expect to stand up on the first attempt and glide, the first week will feel like failure. If you expect to spend most of your early sessions paddling, falling, and getting tumbled by whitewater, then every successful ride feels like a bonus.
How a wave actually works
Ocean waves are energy travelling through water. That energy usually started as wind blowing across a distant stretch of sea. As the swell approaches shallow water near the shore, the bottom drags on the wave, the wave slows, and it grows steeper until the top spills forward and breaks. The area where this happens is called the lineup or the impact zone, and where exactly waves break depends on the sea floor beneath them.
Once a wave has broken, it becomes whitewater (also called foam, soup, or white water). Whitewater is a rolling mass of aerated water that keeps heading to the beach. It has real push, it is far more forgiving than an unbroken wave, and it is where every beginner should start. The unbroken, green part of the wave in front of the foam is called the face. Riding the face, sliding sideways along it, is what most people mean by “real” surfing. You earn the face later.
The three skills that matter most
- Paddling. Paddling gets you out through the waves and lets you match a wave’s speed so it can pick you up. Strong, efficient paddling is the most underrated skill in surfing, and stronger paddlers simply catch more waves.
- The pop-up. This is the movement from lying on your stomach to standing on your feet in one smooth motion. It needs to become a reflex, so you will practice it on dry land before you ever need it in the water.
- Wave awareness. This is the ability to read where waves are breaking, where other people are, and where the current is taking you. It develops slowly through time spent in the water, but a good lesson or an observant hour on the beach can speed it up considerably.
Why the ocean is a great teacher
Unlike skateboarding or snowboarding, surfing happens on a surface that changes every few seconds. No two waves are identical, so you cannot simply memorize a motion; you learn to respond. That is exactly why the sport is so absorbing. It is also why patience matters. Progress comes in sudden jumps: you spend a week feeling stuck, then one afternoon something clicks and you ride three waves in a row.
Soft-top beginner boards are stable, buoyant, and forgiving when you fall.
Is Surfing Hard? Honest Expectations for Beginners
Yes, surfing has a steeper early learning curve than many sports, and it is better to hear that now than to discover it at the beach. We go into this question in depth in our guide on whether surfing is hard, but here is the practical summary: the difficulty is real, it is front-loaded, and it is almost entirely manageable with the right setup.
Where beginners struggle
The first obstacle is physical. Paddling uses shoulders, upper back, and core muscles that most people rarely work in that way, and a beginner’s arms often give out before their enthusiasm does. The second obstacle is timing. A wave offers a short window in which you can catch it, and learning to paddle at the right moment takes repetition. The third is balance. Even whitewater is chaotic, and your first stance will wobble.
There is also a mental side. Being tumbled by a wave can be disorienting, especially if you are not used to the ocean. Beginners who stay calm, protect their head, and surface patiently quickly find that falling is part of the fun rather than something to fear.
What makes it easier
- A large, wide, soft board that floats you easily and rarely hurts when it hits you.
- Small, slow waves in waist-deep water instead of waves that jump up from deep water.
- A wetsuit that keeps you warm enough to practice for an hour instead of fifteen minutes.
- Short, frequent sessions rather than one exhausting marathon each month.
- Time on dry land practicing the pop-up so your body already knows the motion.
A realistic timeline
| Stage | Typical time | What it looks like |
|---|---|---|
| Getting comfortable | Sessions 1 to 3 | Paddling, falling off, getting a feel for whitewater, maybe standing briefly |
| Standing on foam | Sessions 3 to 10 | Standing up on most whitewater waves and riding straight to the beach |
| Unbroken waves | Roughly 1 to 3 months of regular practice | Paddling out past the break and catching small green waves |
| Trimming and turning | Several months onward | Riding along the face instead of straight in |
These ranges move a lot depending on how often you surf, how fit you are, and how consistent the waves are where you live. Someone who surfs twice a week will progress much faster than someone who surfs twice a month, no matter how athletic they are.
Good news: You do not need to be a great swimmer or an elite athlete, but you do need to be comfortable in the water and able to swim without panic. If you are not, spend time in a pool before you head to the surf.
Resistance bands and a simple beginner guide book make practice easier on days with no waves.
Choosing Your First Surfboard
Your first board matters more than almost any other decision you will make. A board that suits your size and ability makes catching waves easy. A board that is too small, too thin, or too sharp makes everything harder and sometimes painful. The goal for your first board is simple: maximum floatation and stability.
Soft-top versus hard board
A soft-top (also called a foamie) has a foam deck and a soft outer shell, and most beginners should start there. It is light, buoyant, wide, and forgiving. When it knocks into you, it hurts much less than a fiberglass board. Its fins are usually flexible plastic as well, which is kinder to your legs. Fiberglass shortboards and fish shapes are designed for responsive performance, and they are difficult and frustrating for a beginner to paddle and balance.
Why soft-tops win
- Extra volume makes paddling and catching waves easier
- Much safer for you and for other surfers around you
- Usually cheaper, and they handle dings without leaking
- Grippy deck so you often do not need wax
The trade-offs
- Less responsive when you want to turn sharply
- Wide, thick shape feels slow in bigger, steeper waves
- Most people outgrow them after a year or so
- Less resale value than a quality hard board
How long should your first board be?
A reliable rule is to start longer than you think you should. Bigger boards float more of your body weight, so you can paddle earlier and stand up with less rush. As a loose guide, most adults do well on a soft-top between eight and nine feet, with heavier or taller surfers going toward the longer end.
| Surfer weight | Suggested soft-top length | Notes |
|---|---|---|
| Under 130 lb (about 59 kg) | 7’6″ to 8’0″ | Choose a wide, stable outline |
| 130 to 180 lb (about 59 to 82 kg) | 8’0″ to 8’6″ | Most common beginner range |
| 180 to 230 lb (about 82 to 104 kg) | 8’6″ to 9’0″ | Extra volume helps early paddling |
| Over 230 lb (about 104 kg) | 9’0″ or longer | Consider a foam longboard |
Rent, borrow, or buy?
For your first few sessions, renting is perfectly fine. Surf schools and local surf shops usually rent soft-tops and wetsuits by the hour or by the day, and some offer packages that include lessons. Once you know you love it, buying your own board saves money and lets you practice more often. A used soft-top from a local shop or marketplace is a great value, but check for cracks in the foam, loose fins, and a worn-out leash plug.
Fins and leashes
Many beginner boards ship with soft fins already attached. If yours does not, use the three-fin thruster setup, which gives steady tracking. A leash is non-negotiable: it keeps the board attached to your ankle so a loose board does not become a missile in the water. Choose a leash roughly equal to your board length, with a comfortable cuff.
Leashes, fins, and traction pads are small purchases that make a big difference.
Everything You Need for Your First Surf Session, and Nothing You Don’t
Gear shopping can spiral quickly, especially when every surf shop wall is covered in products that promise to improve your surfing. The truth is that a beginner needs a short list. Our complete breakdown of what you need for surfing goes further, but here is the working version you can take to the beach.
The essentials
- A soft-top surfboard sized for your weight and ability, as covered above.
- A leash that attaches the board to your back ankle (the foot that sits at the tail when you stand).
- A wetsuit or rash guard appropriate for the water temperature. More on that in the next section.
- Surf wax or a traction pad to keep your feet from slipping. Soft-tops often grip well on their own, but a little wax helps.
- Reef-safe sunscreen for face and neck, applied before you go in. The sun reflecting off water is intense even on cloudy days.
- A towel and a change of clothes for afterward, plus fresh water to rinse your gear.
Useful extras
- Surf booties, gloves, and a hood in cold water; these turn a miserable session into an enjoyable one.
- A changing poncho so you can slip out of a wet suit at the car without a scene.
- A board bag or sock to protect the board in your car and from the sun.
- A waterproof phone pouch or car key lock box because you should never take valuables into the water.
- An action camera if you want to review your rides. Our roundup of the best action cameras for surfing covers waterproofing and mounting.
What to skip at first
Do not buy a performance shortboard, an expensive hard board, or a drawer full of specialty fins. Do not buy a big package of accessories you do not understand. Rent or borrow for the first month, then spend your money where your experience tells you it matters.
| Item | Priority | Why it matters |
|---|---|---|
| Soft-top board | Must have | Stability, safety, and ease of learning |
| Leash | Must have | Keeps the board from hitting people |
| Wetsuit or rash guard | Must have | Warmth and skin protection |
| Wax or traction pad | Must have | Prevents slipping during pop-ups |
| Sunscreen | Must have | Protects skin from long exposure |
| Booties, gloves, hood | Climate dependent | Essential in cold water |
| Action camera | Optional | Self-review of technique |
Wax, a comb, and reef-safe sunscreen cost very little and make every session better.
Wetsuits, Layers, and Staying Warm in the Water
Cold is the number one reason beginners quit a session early. You are going to spend long stretches sitting or lying in water that is colder than the air, and wet skin loses heat quickly. A wetsuit solves most of this by trapping a thin layer of water against your body, which your body heat then warms. A good fit matters: it should feel snug like a firm hug, with no large gaps at the lower back, armpits, or neck.
Matching thickness to water temperature
Wetsuit thickness is shown as numbers like 3/2, where the first number is the thickness in millimeters across the torso and the second is thickness in the arms and legs. A thicker suit is warmer but a bit more restrictive. Use this table as a rough starting point and adjust for how easily you get cold.
| Water temperature | Typical suit | Extras |
|---|---|---|
| Above 75°F (24°C) | Swimsuit, rash guard, or shorty | Sun protection |
| 68 to 75°F (20 to 24°C) | 2mm shorty or 2mm full suit | Optional light layers |
| 60 to 68°F (15 to 20°C) | 3/2 full wetsuit | Optional booties |
| 52 to 60°F (11 to 15°C) | 4/3 full wetsuit | Booties and gloves |
| Below 52°F (11°C) | 5/4 or thicker hooded suit | Booties, gloves, and hood |
If you surf somewhere genuinely cold, our guide to the best cold water wetsuit for surfing goes through thick suits, zipper styles, and what to look for in seams and linings.
What a wetsuit costs
Prices vary widely depending on thickness, materials, and brand. Entry-level suits can be inexpensive and perfectly adequate for a beginner, while premium suits use stretchier neoprene and sealed seams for much better warmth and comfort. If you want specifics on budgeting, our article on how much a wetsuit costs for surfing breaks down price tiers and where it is worth spending more.
What to wear underneath
People often wonder whether to wear anything under a wetsuit. A swimsuit, board shorts, or bikini works well, and many surfers add a thin rash guard for comfort and to reduce chafing under the arms. We cover options in detail in our post on what to wear under a wetsuit for surfing. If you are surfing in warm water without a wetsuit, see what to wear surfing for outfit ideas that stay put when you get tumbled by a wave.
Booties, gloves, and hoods
Your hands and feet get cold first, and cold hands and feet make paddling and balancing feel clumsy. In cooler water, surf booties with a thin sole also protect against rocks and shells at the entry point. They add a tiny bit of bulk, so you will feel the board slightly less, but warmth easily outweighs that.
Care and fit tips
- Try suits on and move around: crouch, reach, and pretend to paddle.
- Rinse with fresh water after every session and hang the suit by its waist from a wide hanger so it does not stretch at the shoulders.
- Dry it inside out first, then right side out, in shade rather than direct sun.
- Never leave it in a hot car, which breaks down the neoprene and glue.
A properly fitting wetsuit is the single best upgrade for beginner comfort.
Picking the Right Beach, Tide, and Day to Learn
A great beach choice can make learning twice as fast. A bad one can turn an eager first session into a scary afternoon. You want gentle, predictable, forgiving surf, and you want other people nearby who know the area.
Look for a beach break
A beach break is a place where waves break over sand rather than rock or coral. Sand is soft to fall on and is generally the safest bottom for learning. Point breaks and reef breaks tend to produce more powerful, more consistent waves, but they put you in front of hard surfaces and crowds of more experienced surfers. Learn on sand first.
Ask about the local conditions
The easiest research is a conversation. Local surf shops and surf schools know which beaches are friendly for beginners, which sections are best at different times of day, and any hazards that do not show on a map. Many beaches also have lifeguards who can tell you about the day’s currents and conditions before you go in.
How to read a surf forecast
Forecast websites and apps show a handful of numbers that are worth understanding:
- Wave height. For learning, look for waves of one to three feet. Anything above shoulder height for a beginner is too big.
- Swell period. This is the time between waves. Short periods (under eight seconds) produce choppy, weak waves. Longer periods bring stronger waves. Beginners generally do best in shorter periods because the waves are gentler.
- Wind. Light winds blowing from the land to the sea (offshore) groom the wave face. Onshore wind from the sea makes everything choppy. For first sessions, calm or lightly offshore conditions are ideal.
- Tide. Tide changes how and where waves break and how deep the water is.
Which tide is best?
There is no universal answer, because each beach reacts differently. Some spots work best at mid-tide, others at low or high. As a beginner, mid-tide is often a good choice because the waves tend to be soft and there is enough water depth for safe falls. We explain this in our post about what tide is best for surfing, including how to find the sweet spot at your local beach.
Timing your day
Early mornings often have lighter winds and glassier water, though they also bring chilly air and dawn patrol crowds. Late afternoons can work too, but wind often picks up. Weekdays are quieter than weekends. Whatever the time, aim to arrive early enough to watch the waves for fifteen minutes before you enter the water. You will see where they break, where people paddle out, and which areas have rips.
Pro tip: Watch for a “channel”: a darker, calmer strip of water where fewer waves break. Experienced surfers use these to paddle out. As a beginner, you will rarely need one, because you will stay inside the whitewater.
A durable action camera lets you review your pop-up and see what to fix.
Surf Safety, Rip Currents, and Etiquette Basics
Surfing is safe when you respect the ocean and the people in it. The vast majority of beginner problems come from the same short list of avoidable situations. Spend a few minutes absorbing this section and you will already be ahead of most people paddling out for the first time.
Rip currents
A rip current is a narrow channel of water flowing away from shore. It forms when water pushed up the beach by waves needs to find a way back out. Rips can look like a calm, dark patch of water, a gap in the breaking waves, or a line of foam or debris moving seaward. They are dangerous for swimmers because they can pull people away from the beach, but experienced surfers sometimes use them as a free ride out.
If you get caught in a rip, stay calm. Do not paddle directly against it. Swim or paddle parallel to the shore until you are out of the current, then head to the beach. Your board floats, so keep hold of it. Wave and call out if you need help.
Protect your head
When you fall, protect your head with your arms. Fall flat and away from the board, never head-first into shallow water. Surface slowly with a hand above your head to protect against a floating board. Keep in mind that the leash can bring the board back toward you, so always know where it is.
Know your limits
- If waves are above your head, or you feel anxious, stay on the beach. There will be another day.
- Do not go out alone if you are new. Bring a friend, or surf near a lifeguard tower.
- Stop when you are tired. Fatigue causes poor decisions and weak paddling.
- Stay hydrated, eat beforehand, and avoid alcohol before a session.
Etiquette: the unwritten rules
Surfing has a few simple rules that keep everyone safe and friendly. They matter even more when you are learning, because a beginner’s board can hurt someone if it gets loose or collides.
- Right of way belongs to the surfer closest to the peak. The peak is where the wave first starts to break. If someone is closer to the peak than you, they have priority, so do not paddle for the wave.
- Never drop in. Dropping in means taking off on a wave that someone else is already riding. It is the most serious breach of etiquette and a common cause of collisions.
- Do not snake. Paddling around someone to steal position is rude and reduces trust.
- Hold on to your board. Never let go and let it fly toward other people. If you have to bail, push it aside or dive under.
- Communicate. A friendly call of “left” or “right” tells others which way you plan to go.
- Stay out of the way. Paddle around the breaking area, not through it, when moving back out.
- Share and say sorry. If you make a mistake, apologize. Most surfers will forgive a beginner who is trying to do the right thing.
The simplest solution for new surfers is to stay in the whitewater zone near the shore, away from the main lineup. That keeps you out of experienced surfers’ way and, conveniently, is exactly where you should be practicing.
Reef-safe, water-resistant sunscreen and a rash guard keep a long session comfortable.
The Step-by-Step Method, Part One: Prepare and Practice on Land
Here is where the plan comes together. The method below is the same one most surf schools use: learn the movements on dry sand, then repeat them in small whitewater, then gradually move to bigger and more demanding waves. There are eight steps in total. The first three happen on land, which makes them the cheapest, safest practice you will ever get.
Wax the Deck and Attach Your Leash
Before you go anywhere near the water, set up your board. Start with the deck, the top surface you stand and lie on. If your board is a hard board or a soft-top without a built-in grippy surface, rub a bar of surf wax across the deck in a crosshatch pattern, then in small circles, until you feel small bumps. Pay most attention to the zone where your feet and chest will go. Avoid waxing the rails (edges) heavily, since your hands and body will slide over them while paddling.
Choose wax that matches the water temperature, because cold-water wax is softer and warm-water wax is harder. If you are using a soft-top with a textured deck, you may only need a light coat. Next, connect the leash. The cuff goes around your back ankle: the foot that will be nearest the tail when you stand. The other end clips to the leash plug near the tail of the board. Check that the velcro is tight and the cord has no kinks or knots.
Carry the board properly while you are at it. Hold it under your arm with the fins facing inward and the nose pointing forward, or carry it on your head if it is long and you are comfortable doing so. In wind, keep it close to your body so it does not catch and swing.
Find Your Balance Point and Practice Lying and Paddling
Lie on your board on the sand, or on a lawn, and find where you balance. Your chest should rest just ahead of the middle of the board so that the nose sits about an inch or two above the water when you float. If the nose is pushed down, shift back; if the tail drags, shift forward. In the water this small change makes a massive difference to how easily you paddle.
Keep your legs together, toes pointed toward the tail, and your head up looking forward rather than down at the board. Arch your back slightly so your chest lifts. Now practice the paddle motion: reach one arm forward, put your hand in the water cupped with fingers closed, pull it all the way back along your body, then swap arms. Use long, deep, alternating strokes. Short, splashy paddling wastes energy.
- Keep your feet off the water so they do not drag and slow you down.
- Breathe steadily; do not hold your breath while paddling.
- Practice for a few minutes on land to build the muscle memory, and expect your shoulders to burn by the end of the first session.
Practice the Pop-Up on the Sand
The pop-up is the single most important move in surfing, and you can practice it anywhere. Lie on your board on the sand with hands flat beside your chest, fingers pointing forward. In one smooth motion, push your upper body up like a push-up, swing your back foot forward to land near the middle of the board, then bring your front foot forward between your hands and set your feet shoulder-width apart. Stand with knees bent, chest up, and eyes forward.
Your stance will be either regular (left foot forward) or goofy (right foot forward). Neither is better; it is just how your body is built. You can find out by noticing which foot you step forward with when someone gently pushes you from behind. Do not stand with your feet in a straight line along the board. They should be across the board at a slight angle, roughly shoulder-width apart, like a skateboard stance.
Drill: Repeat the pop-up twenty times in a row, aiming for a motion that is smooth and quick. Time yourself; many instructors aim for about a second. Practice both before sessions and on rest days, and film yourself from the side to check your stance.
A traction pad and a good board make pop-up practice more realistic.
The Step-by-Step Method, Part Two: Paddle, Catch, and Stand
With your setup ready and your pop-up practiced, it is time to enter the water. Remember the goal for these first sessions: knee- to waist-high whitewater, waist-deep water, and as many repetitions as your arms can handle.
Enter the Water and Position Yourself in the Whitewater
Walk into the water carrying your board beside you, leash attached, with the nose pointing toward the oncoming waves. When waves come at you, turn the board to face them and hold it firmly on both sides while the whitewater passes, or push the nose down and duck under it. Keep wading until the water is about waist-deep, then stop.
That depth is the sweet spot: deep enough that your board floats clear and your fins will not hit the bottom, shallow enough that you can stand if you fall. Stay clear of other people, and especially clear of experienced surfers who are riding or waiting in the lineup further out. Check where you are relative to the beach every few waves, because currents slowly push you sideways and you may find yourself drifting into a crowd or toward a hazard.
Before you try to catch anything, stay put for a minute or two and observe. Look over your shoulder toward the beach so you can see how waves approach, and notice how often they come in sets, a group of waves followed by a calmer period. Learning this rhythm helps you time your first wave.
Turn Toward the Beach and Paddle Into a Wave
When you see a whitewater wave approaching that is a comfortable size and you have clear space around you, hop onto your board in the position you practiced. Point the nose toward the beach. Look over your shoulder as the wave approaches, and when it is a few body-lengths behind you, begin paddling with firm, even strokes. You are trying to match the wave’s speed, so paddle harder than feels necessary.
You will feel the board lift slightly and then surge forward as the wave picks you up. At that point, take one or two more strokes, then stop paddling and lift your chest to prepare. Many beginners stop paddling too early because the sensation feels unfamiliar. If the wave does not carry you, it usually means you needed a few more strokes, so just try again.
- Keep your head up. Looking down pushes the nose under and makes the board “pearl.”
- Stay centered on the board. Drifting too far back means the wave rolls past you; too far forward and the nose dives.
- Stay low until the wave has clearly caught you, then think about standing.
Pop Up and Ride Straight to the Beach
Once you feel the board pulled forward by the wave, place your hands flat on the deck beside your chest and perform the pop-up exactly as you practiced. Do it as one movement, not two. Aim to land with your back foot over the area above the fins, roughly over the tail section, and your front foot just behind the middle of the board, toes angled slightly forward. Keep your knees soft, hips low, and arms out for balance.
Look at the beach, not your feet. Your body follows your eyes, and looking down destabilizes you. If you wobble, bend your knees more and lower your center of gravity. Ride all the way to the sand, or until you fall. Even a two-second ride deserves a quiet moment of celebration, because you just did the thing.
Common issue: If you keep tumbling off the same side, your feet are probably too close together or too far from the center line of the board. Re-set your stance from the sand drill until your feet land in the same place each time.
A stable, wide soft-top and grippy deck give you the confidence to pop up.
The Step-by-Step Method, Part Three: Fall Well and Start Steering
Falling and steering sound like opposites, but they belong together. Falling cleanly lets you take more risks, and steering turns a straight-line ride into real surfing. Both are skills, and both can be practiced deliberately.
Learn to Fall Safely
You will fall far more often than you ride, so make it a habit to fall well. When you feel yourself losing balance, do not fight it. Fall to the side, flat, and away from your board, keeping your body horizontal so you do not hit the bottom. Cover the back of your head with your forearms. After the wave passes, let your body float to the surface instead of kicking frantically; the ocean will not hold you under for long.
Always come up with one hand raised above your head to protect against the board, which may have been pulled back toward you by the leash. Then find the board, climb on, and look around for waves and other people. If you are in shallow water, put your feet down rather than diving in head first, since the sand bottom is closer than it looks.
- Never dive head-first off the board in shallow water.
- Do not grab the leash cord to pull the board toward you; follow the cord hand over hand if you must, with your other arm protecting your head.
- Practice falling deliberately in knee-deep foam, so the reaction becomes automatic.
Steer, Trim, and Ride Along the Wave
Once you are standing reliably on whitewater, you can start steering. Steering in surfing happens mostly through your eyes and your weight. Look in the direction you want to go, turn your shoulders and hips to match, and gently press weight onto your back foot. On a soft-top this will angle the board and send it along the wave. Press with your toes to turn one way, and with your heels to turn the other.
Aim for a gentle diagonal path rather than a sharp turn. As you ride, keep your weight centered and your knees flexed, adjusting your speed by moving slightly forward (to go faster) or back (to slow down and turn more). This is the beginning of trimming, which is the foundation for everything more advanced. Once this feels natural in the whitewater, you can start paddling out past the break to catch small unbroken waves.
Fins and deck pads help your feet stay planted when you start steering.
Common Beginner Mistakes and How to Fix Them
Almost every surfer has made the same mistakes you are about to make. Knowing them in advance saves weeks of frustration. Use the table below as a diagnostic: when something is not working, find the symptom and try the fix on your next session.
| Symptom | Likely cause | Fix |
|---|---|---|
| The nose dives under water | Weight too far forward or head down | Slide back on the board and keep your chest and eyes up |
| Waves pass underneath you | Not enough paddle speed or too far back | Paddle harder and start earlier; shift forward slightly |
| You cannot get to your feet in time | Slow or two-step pop-up | Drill the pop-up on sand until it is one fluid motion |
| You fall off sideways immediately | Feet too narrow or off the center line | Widen your stance and land feet on the board’s center line |
| You get exhausted quickly | Inefficient paddling or poor fitness | Use long, smooth strokes and train shoulders and core off the water |
| You feel cold and stiff | Suit too thin or loose | Move up a thickness, check fit, add booties or gloves |
| You keep colliding with others | Surfing too close to the lineup | Move down the beach to open whitewater and watch the crowd |
Mistakes that are really about mindset
- Moving to bigger waves too soon. Bigger waves are not a reward for time served; they are a risk. Move up only when you are standing on most waves in your current size.
- Buying a small board because it looks cooler. A shorter board is harder to paddle and stand on. Choose function over looks.
- Surfing alone and tired. Many beginner accidents happen at the end of a long session when judgment slips.
- Comparing yourself to others. The person next to you may have surfed since childhood. Compare yourself to last week’s you.
- Skipping lessons entirely. A couple of lessons with a good instructor can compress months of trial and error, and they teach safety in a way no article can.
Should you take a lesson?
Teaching yourself is possible, but most people progress faster and more safely with at least one or two lessons. A good instructor gives real-time feedback on your pop-up, shows you where it is safe to practice, and makes sure you are using appropriate equipment. If budget is tight, a group lesson is a good compromise, and many surf schools offer package deals that make the per-session price fall.
A board sock, a repair kit, and a good wax comb keep a beginner setup working for years.
Your First Three Months: A Simple Progression Plan
Progress in surfing rewards consistency far more than intensity. Two or three short sessions a week will take you further than one long, exhausting weekend. Here is a loose plan you can adapt to your own schedule and conditions.
Weeks 1 and 2: Comfort and foam
Focus on getting comfortable in the water. Do the land drills, paddle in the whitewater, and aim to catch a handful of waves each session. Do not worry about standing perfectly; just practice lying down and riding the wave in. Surf for an hour or so, and stop before you are totally wrecked.
Weeks 3 to 6: Standing on foam
By now you should be popping up on most waves. Focus on stance, eyes forward, and keeping the board straight to the beach. Start to experiment with the diagonal path and try small turns. Think about fitness: swim laps, do push-ups and planks, and stretch your shoulders and back.
Weeks 7 to 12: Moving toward green waves
When you are standing on nearly every foam wave, you can start venturing a little farther out. Sit on your board just beyond the whitewater and watch the lineup. Learn to turn the board toward the beach, paddle for small unbroken waves, and take off on the green face. Expect to fall a lot again, and expect the feeling to be a mix of frustration and thrill. Stay in smaller waves, and do not hesitate to go back to the foam for a session when you need confidence.
Fitness that helps
- Swimming builds paddling endurance and ocean comfort.
- Push-ups and planks strengthen the pop-up and core.
- Mobility work for shoulders, hips, and lower back reduces stiffness after sessions.
- Balance training, such as a balance board, improves stability.
Keep a simple surf log
After each session, jot down the conditions (wave size, tide, wind), what you worked on, and one thing to try next time. After a month you will have a clear picture of which conditions suit you best, and your progress will be easy to see on days it feels like you are not improving.
When to upgrade your board
You will know it is time when you are catching unbroken waves consistently and your board feels like it is holding you back in turns. Moving from a soft-top to a mid-length or a smaller hard board is a natural next step, but do it gradually. Many people stay on a larger board for years and enjoy every ride.
Booties, gloves, and a hood keep you surfing through colder months.
Frequently Asked Questions About Starting to Surf
How long does it take to learn to surf?
Most people stand up on whitewater waves within their first few sessions and ride unbroken waves after one to three months of regular practice. Your timeline depends on how often you surf, your fitness, the conditions where you live, and whether you take lessons.
Do I need to be a strong swimmer to surf?
You need to be comfortable in the water and able to swim without panic, but you do not need to be a competitive swimmer. Your board and leash provide flotation. If you are nervous, practice in a pool first and always surf in small waves near a lifeguard.
What size surfboard should a beginner use?
Most adult beginners do best on a soft-top between eight and nine feet long, with heavier surfers on the longer end. A larger, wider board floats more of your weight, which makes paddling and standing much easier.
Should I rent or buy my first board?
Renting is a smart choice for your first few sessions while you learn what you like. Once you commit, a used or entry-level soft-top is a good value and lets you practice more often.
What should I wear when I start surfing?
It depends on water temperature. In warm water, a swimsuit and rash guard are enough. In cooler water, you will want a wetsuit, and in cold water booties, gloves, and a hood as well. See our guide on what to wear surfing for outfit ideas.
Is surfing dangerous for beginners?
Surfing carries real risks, but most are avoidable. Choose small waves, sandy beaches, and supervised areas. Learn about rip currents, use a leash, protect your head when you fall, and do not surf beyond your ability.
What is the best time of day to learn?
Early morning often offers lighter winds and cleaner waves, while weekdays tend to be less crowded. The best choice also depends on your local tides, so check a forecast and watch the waves before going in.
How do I know whether I am goofy or regular?
Regular means left foot forward, goofy means right foot forward. A simple test is to notice which foot you instinctively step forward with, or which foot you would put forward on a skateboard. Try both in the sand pop-up drill and choose the one that feels natural.
Do I need wax on a soft-top surfboard?
Many soft-tops have a grippy deck and need little or no wax, but a light coat can help if your feet slip, especially in cold water. Traction pads are another option and are popular on both soft and hard boards.
What should I do if I get caught in a rip current?
Stay calm, stay with your board, and do not paddle directly against the current. Paddle or swim parallel to the shore until you are out of the rip, then return to the beach. Signal for help if you cannot escape.
How often should I surf as a beginner?
Two to three sessions a week of an hour or so each is ideal for steady progress. Short, regular sessions build skills faster than occasional long ones, and they help you avoid burnout and injury.
Do I really need a wetsuit?
In warm water you can surf in a swimsuit and rash guard. In anything cooler, a wetsuit makes your sessions longer and safer by keeping your body temperature up. Learn more about options and prices in our guide on how much a wetsuit costs for surfing.
Conclusion: Your Wave Is Waiting
Starting to surf is simple to describe and challenging to do, and that combination is part of what makes it so addictive. The recipe is straightforward: choose a big, soft board; wear a wetsuit that matches the water; pick a small, sandy, supervised beach; practice your pop-up on land; and spend your first sessions riding whitewater in waist-deep water. Fall safely, respect the ocean and the people in it, and let your skills build one wave at a time.
You will have frustrating sessions. You will also have the moment when the board surges forward, your feet find their place, and the beach slides toward you under your own power. That feeling is the reason millions of people keep coming back. Be patient with yourself, take a lesson if you can, and enjoy the process.
When you are ready, set up your first kit and head to the water. The ocean is not going anywhere, and neither is your next ride.
Start with a stable beginner board, a leash, and a wetsuit that fits.
As an Amazon Associate we earn from qualifying purchases. If you click an Amazon link on this page and buy something, we may earn a small commission at no extra cost to you.
Pingback: How Long Does It Take to Learn Surfing?